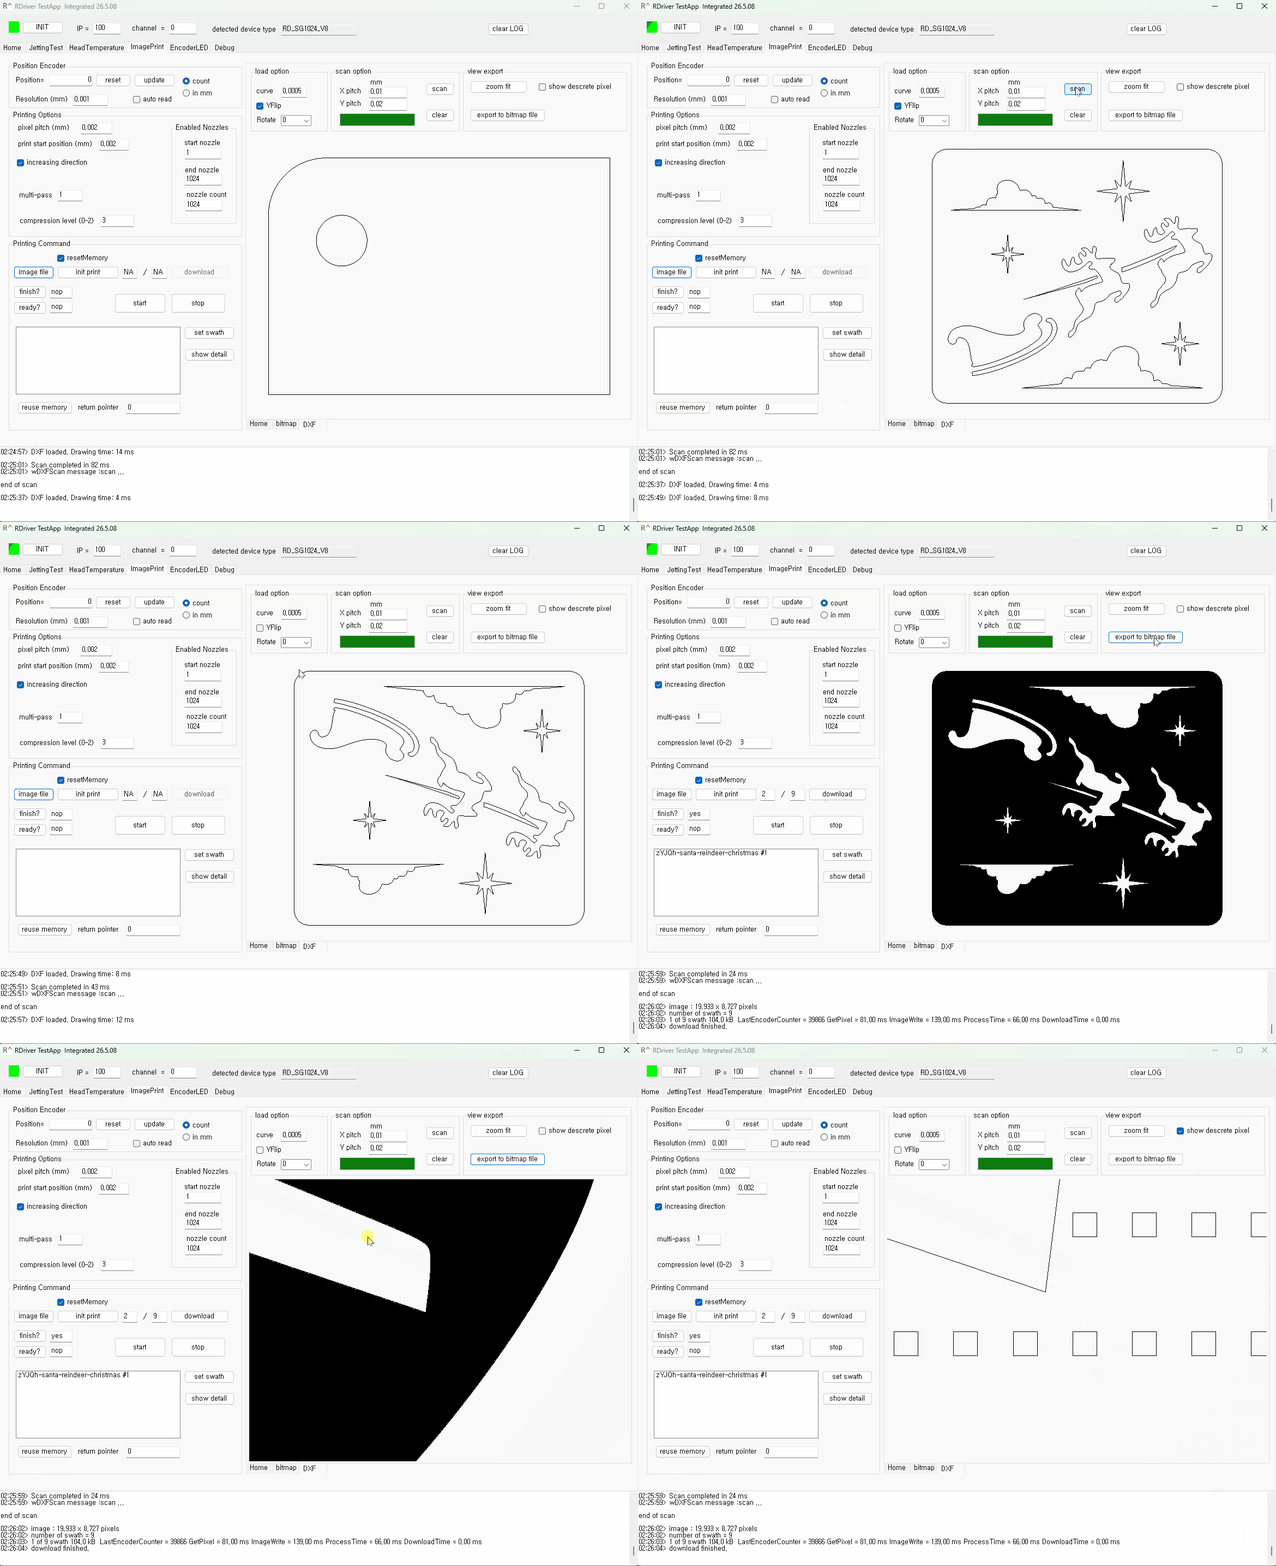
Printing DXF Files
RDriver uses the proprietary wDXFScanEngine library to process DXF
files.
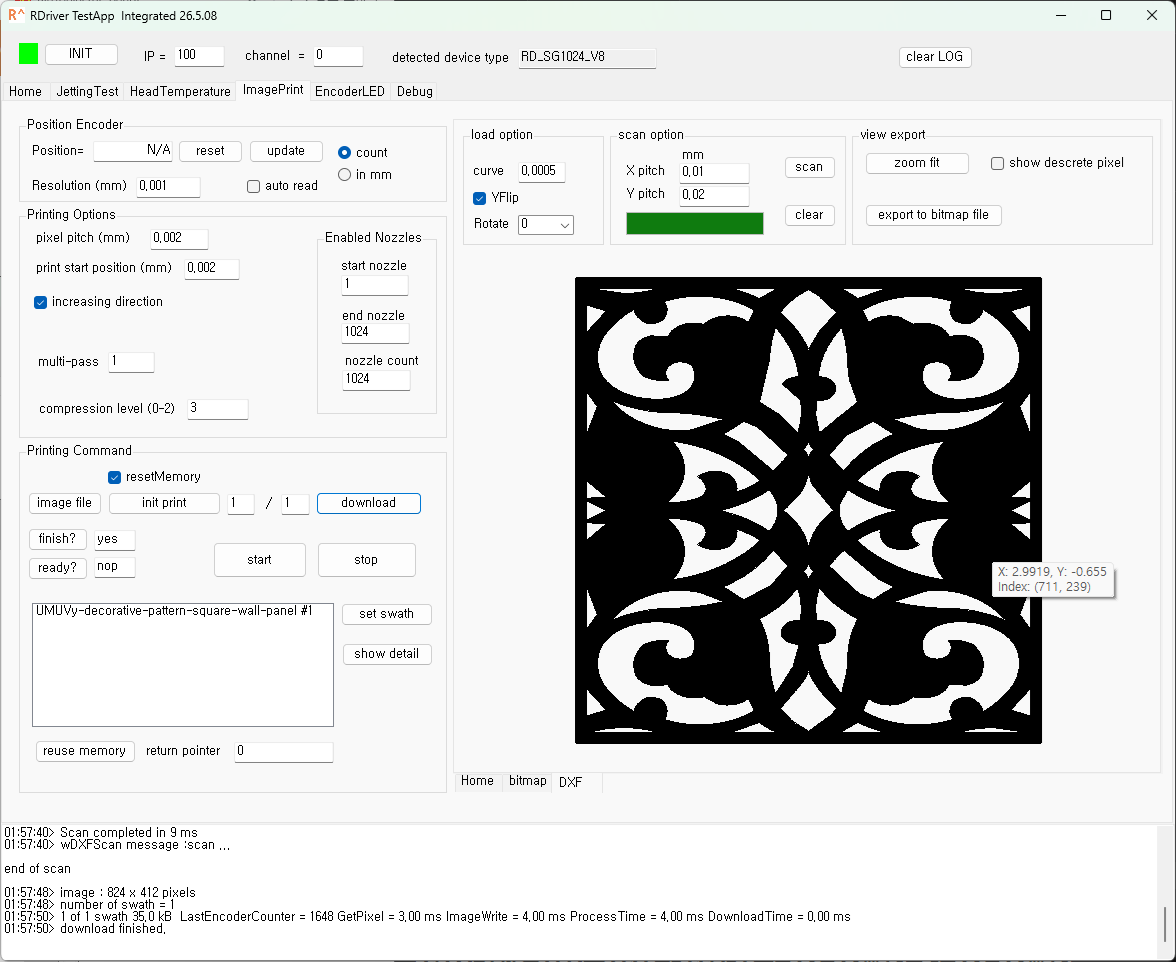
Position Encoder
Position encoder signals are used to synchronize the printing
process with the movement of the printhead.
RDriver can process position encoder signals to ensure accurate
timing and placement of ink droplets on the substrate.
This is particularly important for high-speed printing applications
where precise control over the printhead's position
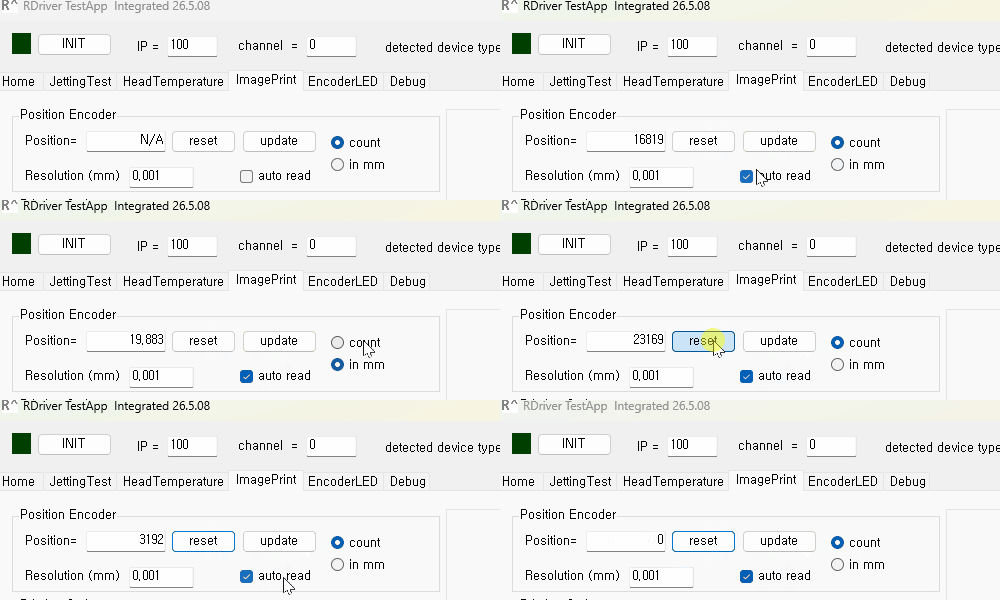
The encoder counter value can be monitored in real time.
Press "reset" to set the counter value to zero, and press "update"
to read the current counter value.
When "auto read" is checked, the "update" function is executed
automatically.
If a resolution value is entered and the radio button is switched to
"in mm", the counter value is converted and displayed in millimeters
(mm).
Printing Options
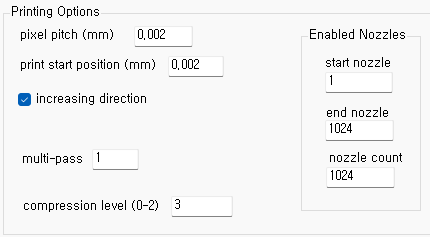
The print options are intended for image processing within the test application and are not used when the user directly makes pixel data from image and write them to the DLL function writePixel().
-
Pixel Pitch
Sets the spacing between printed pixels (dots) during image printing.
-
Print Start Position
Specifies the starting position for image printing.
-
Increasing direction
Determines the direction in which the printhead moves during printing.
Checked means the printhead moves in the increasing direction of the encoder signals, while unchecked means it moves in the decreasing direction.
-
multi-pass
This value is set to 1 when printing at the native nozzle pitch of the printhead.
Enter N when printing N times finer than the native nozzle resolution of the printhead. -
Enabled Nozzles
Selects the nozzles to be used for printing.
Configure this option when not all nozzles are intended to be used. -
Compression level
- 0 : No compression is applied when transferring image data to the printhead controller (PControl in GPCon2).
- 1 : Compression is applied only when identical pixels are repeated.
- 2 : Additional compression is applied when the nozzle on/off pattern within a pixel is uniform.
- 3 : Both compression methods 1 and 2 are applied. (default)
Printing Command
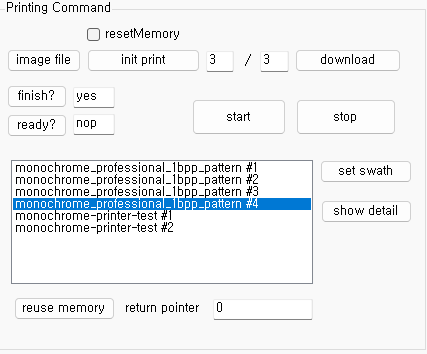

-
After configuring all print options, click
"image file" to choose a DXF file.
In the "Load Option" box, you can enable "YFlip" to flip the image vertically.
You can also select "Rotate" to rotate the image.
The curve value specifies the tolerance used when converting curves into line segments.
The default value is 0.5 µm. -
To print a DXF file, a scanline fill process must first be
performed.
Set the required X pitch and Y pitch values, then click the "Scan" button. - You can save the scanned image into a file by clicking "export to bitmap".
-
Click the "init print" to initialzie printing
memory.
If you need to preserve the previously stored image data, uncheck the "resetMemory" option and click "init print".
(current swath) / (total swath count) is initialized as "1/N".
You can manually change the current swath value to skip the first swath or any other swath as needed. -
Click the "download" button to read the image
data corresponding to the first swath and transfer it to the
printhead controller (PControl inside GPCon2).
When the transfer is completed, finish = "yes" is displayed.
Pressing the button again automatically selects and transfers the next swath within the selected image. -
Multi-swath Memory (Page Memory)
The printhead controller can receive multiple swaths of data at once.
Therefore, by pressing the "download" button repeatedly, data for multiple swaths can be transferred in advance.
The next swath is automatically loaded through the start/stop operation. -
Press the "Start" button to switch the driver and
controller into print mode.
At this time, the printhead should be positioned slightly before the first print position, leaving sufficient margin for the acceleration of the head carriage (stage). - When the head carriage (stage) moves, printing is performed at the specified encoder positions according to the data transferred by "download".
-
Press the "Stop" button after printing is
completed.
The returned message should be checked carefully.
If a problem occurred during printing, an error message will be returned.
Last Not Reached : The last print data was not output.
Possible causes:- The print direction was incorrect.
- The stage did not pass through the first or last print position.